
Quick start
Use this page to find your way around an existing InsightSpace installation and ask your first question. For an exercise with a sample file and expected results, follow your first research project.
Sign in
Section titled “Sign in”- Open the InsightSpace address provided by your administrator. Connect to your organization’s VPN first if the installation requires it.
- Enter your Email and Password, then select Sign in. If you have registered a passkey, you can use Sign in with passkey instead.
- If you do not have an account or cannot access the address, contact your administrator for access.
You use InsightSpace in the browser. Installing the application is the operator’s responsibility.
1. Choose where the work belongs
Section titled “1. Choose where the work belongs”Use the scope selector in the sidebar to choose Personal or an organization.
- Choose Personal for work owned by your account.
- Choose an organization when a team should own and manage the workspace.
The scopes and actions you can see depend on your role.
2. Create a workspace
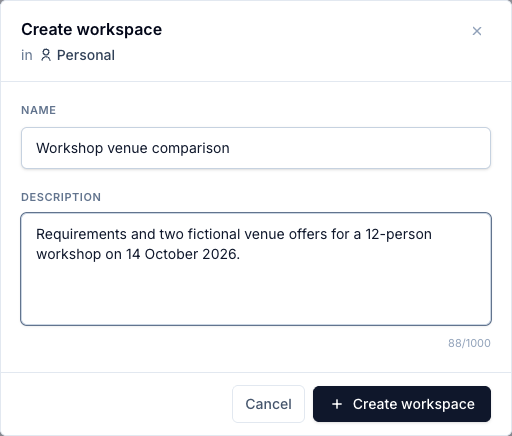
Section titled “2. Create a workspace”Open Workspaces, then select Create workspace. Give the workspace a clear name and a short, factual description.
The description is supplied to the research assistant as context. State the subject, purpose, audience, or relevant terminology. Put detailed response instructions in the assistant settings.
3. Add source documents
Section titled “3. Add source documents”Open the workspace and select Documents → Upload → Upload files. Choose a supported file from your computer. Use Upload folder for a complete folder, or drag files into the document area. InsightSpace preserves folder structure and marks supported uploads as Queued. Select Continue indexing to start processing queued files when no indexing job is running.
Wait until every source you need shows Completed. A file is available to research only when it is both indexed and enabled.
4. Ask a focused question
Section titled “4. Ask a focused question”Select Research → New chat, choose an available model, and ask a question that includes the desired output and evidence standard. For example:
Summarize the main obligations described in these documents. Cite the source for every important claim and flag anything that appears inconsistent.
InsightSpace searches the indexed collection, retrieves relevant evidence, and streams the answer into the conversation.
5. Check the evidence
Section titled “5. Check the evidence”Select a citation in the answer to open its source location. Use the Sources panel to see the documents and extracted items used during the conversation.
Check important claims against the original source. A citation makes verification possible; it does not guarantee that the source was interpreted correctly.
6. Create a deliverable
Section titled “6. Create a deliverable”Ask the assistant to create a report, brief, or case file and save it as a working document. Open Panels → Files to preview or edit the draft, then download it as Markdown, Word, or PDF.
Next steps
Section titled “Next steps”- Understand the core concepts.
- Improve retrieval with documents and indexing.
- Configure response behavior and extraction in workspace settings.
- Learn a repeatable workflow in the first research project tutorial.